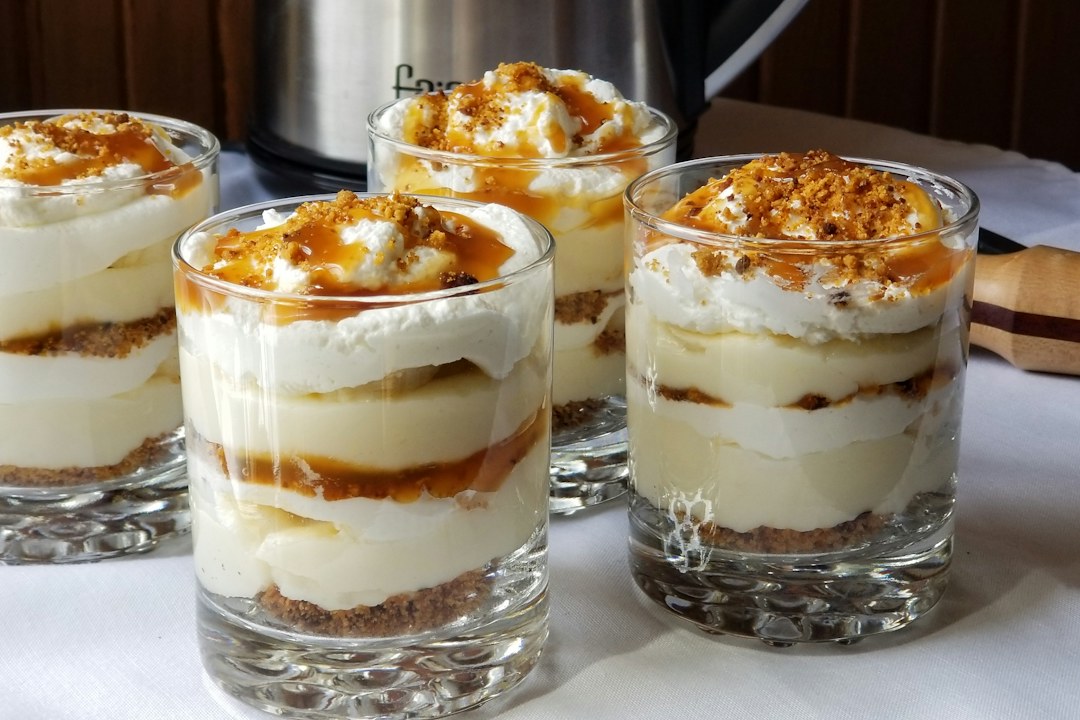
These no-bake apple pie cheesecake cups layer buttery graham crumbs, airy cream cheese filling, and tender cinnamon apples in six individual servings. The only stovetop step is a quick apple topping; the cheesecake layer sets in the refrigerator without gelatin, eggs, or an oven.
Cooling the apples before assembly is the key to keeping the filling thick. The cups can be prepared the day before a gathering, and their separate portions make serving simple. Use firm apples so the topping stays spoonable instead of turning into applesauce.

Prep: 25 minutes Cook: 10 minutes Chill: 4 hours 30 minutes Total: 5 hours 5 minutes Yield: 6 dessert cups
Ingredients
- 3 medium firm apples, peeled, cored, and cut into 1/2-inch dice (about 3 cups)
- 2 tablespoons packed light brown sugar
- 1 tablespoon lemon juice
- 1 teaspoon ground cinnamon
- 1 tablespoon water
- 1 cup graham cracker crumbs (about 8 full sheets)
- 3 tablespoons unsalted butter, melted
- Pinch of fine salt
- 8 ounces full-fat block cream cheese, softened to room temperature
- 1/3 cup powdered sugar
- 1 teaspoon vanilla extract
- 3/4 cup cold heavy whipping cream
- Optional for serving: caramel sauce or extra graham crumbs
Directions
- Make the apple topping: combine the diced apples, brown sugar, lemon juice, cinnamon, and water in a medium saucepan. Cook over medium heat for 8 to 10 minutes, stirring often, until the apples are tender but hold their shape and the liquid is syrupy. Spread the mixture on a plate and cool completely, about 30 minutes.
- Stir the graham cracker crumbs, melted butter, and salt in a bowl until the mixture resembles damp sand. Divide about two-thirds of the crumbs among six 6-ounce glasses or jars and press lightly into the bottoms. Reserve the rest for topping.
- In a large bowl, beat the softened cream cheese, powdered sugar, and vanilla with an electric mixer on medium speed for 1 to 2 minutes, until smooth. Scrape the bowl well.
- In a separate cold bowl, whip the heavy cream on medium-high speed until stiff peaks form, about 2 to 3 minutes. Fold one-third of the whipped cream into the cream cheese to loosen it, then gently fold in the rest until no streaks remain.
- Divide the cheesecake filling among the cups. Spoon the completely cooled apples over the filling, then sprinkle with the reserved crumbs. Cover each cup and refrigerate for at least 4 hours, until cold and set.
- Serve chilled, adding caramel sauce only just before serving if desired.
Tips for a filling that holds its shape
Use block cream cheese. Spreadable cream cheese in a tub contains more moisture and can make the filling loose. Let the block soften at room temperature so it beats smooth without lumps.
Whip the cream separately. Cold cream reaches stiff peaks more reliably in a chilled bowl. Fold gently so the filling keeps the air that gives it structure.
Cool the apples completely. Warm fruit melts the whipped filling and can create watery layers. Spreading the apples on a plate helps them cool faster.
Useful variations
For gluten-free cups, use certified gluten-free graham crackers and check every packaged ingredient. Gingersnap crumbs add a stronger spice flavor. Pears can replace the apples with the same method; begin checking them after 6 minutes because ripe pears soften quickly. For caramel apple cups, drizzle caramel on top at serving time, not before the long chill.
Common questions
Can I use canned apple pie filling? Yes. Chop large apple pieces and use about 1 1/2 cups, but expect a sweeter result. Drain off excess syrup if the filling is very loose.
Can I use whipped topping instead of heavy cream? Fold 1 1/2 cups thawed whipped topping into the beaten cream cheese mixture. The texture and ingredient list will differ, but the cups will still set in the refrigerator.
How far ahead can I assemble them? One day ahead gives the filling time to set while the crumb layer still has some texture. For the crispest crumbs, keep the reserved topping separate and add it just before serving.
Why is my cheesecake layer runny? Common causes are warm apples, tub-style cream cheese, under-whipped cream, or aggressive mixing that deflates the cream. Chill the assembled cups for the full 4 hours before judging the final texture.
Storage and serving safety
Keep the cups covered and refrigerated at 40°F or colder. Serve them cold and return any uneaten cups to the refrigerator within 2 hours. Store up to 3 days; the crumbs soften gradually but remain safe when properly chilled. These cups are not intended for reheating. The cooked apple topping can be refrigerated separately up to 3 days and should be cooled before layering.
Freezing is not recommended because thawed apples can release liquid and the whipped filling may lose its smooth texture.
Estimated nutrition
Per serving, estimated: 420 calories, 5 g protein, 39 g carbohydrate, 28 g fat, 2 g fiber, 27 g sugar, and 280 mg sodium. This is an estimate based on the listed ingredients, excluding optional toppings. Brands, potato sizes, and portions change the result.
Helpful kitchen gear
As an Amazon Associate, MealMadeBright earns from qualifying purchases.